Unlocking the Power of AI: Building a High-Earning Website Without Coding

In today’s digital age, the allure of creating a high-earning website is more tantalizing than ever. However, the barrier of coding skills often deters many from pursuing this lucrative opportunity. Enter Artificial Intelligence (AI), which has revolutionized the way we approach website creation and monetization. Imagine harnessing the power of AI to build a website that not only simplifies tasks for users but also generates substantial revenue—without writing a single line of code. This article delves into how AI can be utilized to create such a site, drawing inspiration from an existing successful tool-based website earning millions monthly.
The premise of using AI in web development is straightforward yet powerful. By leveraging advanced algorithms and machine learning models, AI platforms can generate functional, clean-coded websites tailored to specific needs. For instance, consider a small tools website discussed in the video transcript where simple file conversion services have led to over 147 million organic traffic hits, translating to a staggering $10 million per month. The core functionality revolves around converting files like JPEG to PDF, PDF to Word, and compressing PDFs—tools that are both useful and easy to implement with AI assistance.
This introduction sets the stage for understanding how AI can replicate such success by automating complex processes. With platforms like ChatGPT or Deepseek AI, one can input basic descriptions of desired functionalities, and the AI will produce complete, operational code ready for deployment on sites like WordPress or Blogger. This seamless integration of AI in web development not only democratizes access to technology but also opens up new avenues for entrepreneurship and innovation without the traditional technical barriers.
As we explore further, this article will guide you through the nuts and bolts of creating similar high-traffic, revenue-generating websites using AI, ensuring that even those without prior coding experience can build and maintain their digital ventures. Stay tuned as we delve deeper into the practical steps involved in crafting these digital juggernauts.
Step 1: Creating Your First Tool Page with AI Assistance

Embarking on the journey of creating your first tool page with AI begins with a simple yet crucial step: selecting the right platform. Tools like ChatGPT and Deepseek AI offer robust capabilities for generating functional code without any prior programming knowledge. Once you’ve chosen your AI assistant, the next step involves providing it with precise instructions. Start by pasting the link of an existing tool page that you admire or wish to emulate. This acts as a reference point for the AI to understand the design and functionality you desire.
After setting the reference, craft your prompt carefully. A well-framed prompt might look something like this:
“Create a webpage that converts JPEG images to PDF files. Ensure the design is user-friendly with a drag-and-drop feature.”
By specifying the functionality and emphasizing user interface elements, you guide the AI to focus on essential aspects that will enhance user engagement. Upon submitting your request, the AI will churn out a complete code snippet tailored to your specifications.
Testing the generated code is equally important. Most AI platforms allow you to run the code within their environment to check its functionality. If everything operates smoothly, you can proceed to integrate this code into your website. However, if issues arise, revising your prompt or detailing the problems encountered can help the AI refine the code further. This iterative process ensures that the final output meets your expectations in terms of performance and usability.
By following these steps, even those completely new to web development can successfully create a fully functional tool page. The ease and efficiency offered by AI in this process not only lower the entry barrier for aspiring developers but also significantly shorten the development time, allowing you to focus more on strategizing and less on execution.
Step 2: Securing Free WordPress Hosting

Once your tool page is ready, the next crucial step is hosting your website. Fortunately, securing free WordPress hosting is straightforward, thanks to platforms like InfinitFree.com . Here’s a detailed walkthrough to ensure you get started without any hassle:
- Visit InfinitFree.com : Begin by visiting the platform and registering for free. Provide a valid email address and choose a unique username.
- Confirm Your Email : After confirming your email, you’ll gain access to your dashboard.
- Set Up Your Site : Navigate to the hosting section and click on “Create Site.” Select WordPress from the available options and choose a subdomain that reflects the purpose of your tools website (e.g., “toolkit.infinitfree.com”).
- Enable SSL : InfinitFree automatically assigns a free SSL certificate to your site, ensuring secure data transmission—a critical factor for user trust and search engine rankings.
- Install WordPress : Follow the prompts to finalize the installation. Within minutes, your WordPress site will be live.
To aid in customization and management, watch the comprehensive video guides available in the description of our main tutorial. These videos cover everything from initial setup to advanced configurations, ensuring you can maximize the potential of your new website.
With your WordPress site now hosted and running smoothly, you’re well-equipped to start adding your AI-generated tools pages. This seamless integration of hosting and content management not only empowers you to manage your website efficiently but also positions you to capitalize on the high traffic and engagement potential of a tools-focused site.
Step 3: Integrating and Testing AI-Generated Code on Your WordPress Site
With your WordPress site now securely hosted, the next pivotal step is integrating the AI-generated code into your posts to bring your tool pages to life. Follow these steps:
- Navigate to Your Dashboard : Go to your WordPress dashboard and select “Posts,” then click on “Add New.”
- Switch to HTML View : In the post editor, switch to the HTML view by clicking on the three vertical dots in the upper right corner and selecting “Code Editor.” This mode allows you to paste the raw code provided by the AI directly into your post.
- Paste and Test the Code : After pasting the code, preview the post to see the tool in action. For example, if you’ve created a JPEG to PDF converter, upload a test image file to verify that it correctly converts and downloads as a PDF.
- Refine as Needed : Should any issues arise, revisit the AI platform used to generate the code. Provide a clear description of the problem, and request the AI to rewrite the problematic section of the code. Often, specifying the exact error message or behavior can lead to quicker fixes.
Once the tool functions correctly, publish the post and observe its performance. Monitor user interactions and feedback, as this real-world data can highlight areas for improvement or additional features that could enhance user satisfaction. By iteratively testing and refining each tool, you ensure that every page not only meets but exceeds user expectations, thereby boosting your site’s credibility and effectiveness.
Step 4: Expanding Your Toolkit: Diversifying Tools for Maximum Engagement
Having successfully integrated your first tool, it’s time to expand your toolkit by diversifying the types of tools available on your site. This expansion not only broadens your service offerings but also enhances user engagement and retention. Consider adding tools like:
- PDF to JPEG converters
- Word to PDF converters
- PowerPoint to PDF converters
Each of these tools addresses different user needs and can attract a wider audience to your site.
To create these additional tools, follow a similar process as before. Use the same AI platforms like ChatGPT or Deepseek AI , and provide them with detailed prompts about the new functionalities you desire. For instance:
“Design a webpage that converts Word documents to PDFs with a sleek interface and quick processing speed.”
The AI will generate the necessary code, which you can then test and refine as needed.
Ensuring consistency across your tools is crucial for maintaining a professional appearance and reliable user experience. Use consistent color schemes, fonts, and layout designs across all tool pages. This uniformity helps reinforce brand identity and makes navigation intuitive for users. Additionally, regularly update and optimize your tools based on user feedback and technological advancements to keep your offerings relevant and efficient.
By strategically expanding and consistently updating your toolkit, you not only cater to a broader audience but also establish your site as a go-to destination for various file conversion needs. This strategic approach not only boosts your site’s utility but also enhances its potential to generate significant traffic and revenue.
Step 5: Leveraging AI for Entrepreneurial Success: Your Path Forward

In the rapidly evolving digital landscape, leveraging AI for website creation isn’t just a trend—it’s a transformative strategy that redefines what’s possible in online business. As we’ve explored throughout this article, AI-powered tools democratize access to technology, enabling individuals without coding expertise to build sophisticated, high-earning websites. This capability not only lowers the barriers to entry but also empowers entrepreneurs to innovate and compete in crowded markets.
To embark on your own entrepreneurial journey using AI, start by identifying a niche or need in the market that aligns with your interests and expertise. Utilize AI platforms to develop tailored solutions that address these needs, whether they are in education, health, finance, or any other sector. Remember, the key to success lies in consistency and continuous improvement. Regularly update your tools based on user feedback and emerging trends to maintain relevance and engagement.
Moreover, embrace the iterative nature of AI development. Test, learn, and refine your offerings as you scale your operations. This approach not only enhances your product quality but also builds a loyal user base that trusts in your brand’s reliability and innovation.
For those inspired to take this path, remember that the journey doesn’t end with launching your site. Engage actively with your community, seek collaborations, and always be on the lookout for new ways to add value. By doing so, you position yourself not just as a participant in the digital economy but as a leader shaping its future.
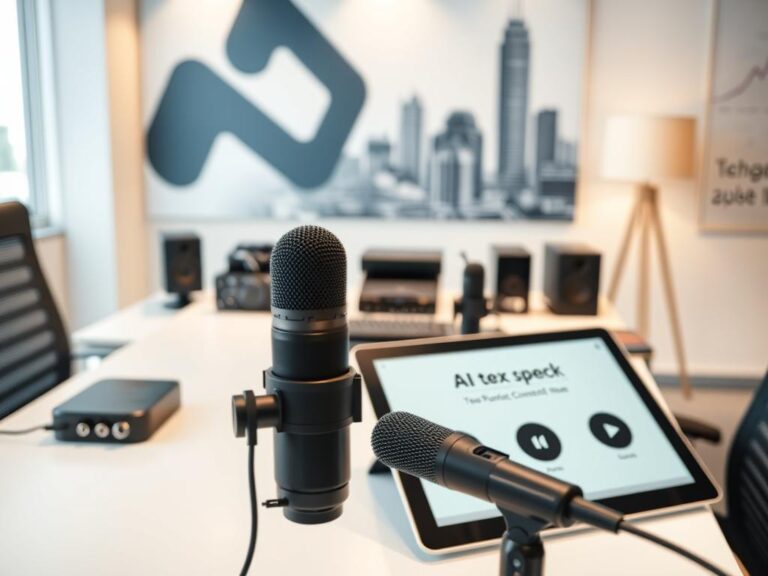
Visualizing Success: Prompts for Compelling Imagery
To complement the rich narrative of building a high-earning website with AI, incorporating visually engaging images at strategic points can significantly enhance the reader’s experience. Here are some prompts for generating compelling visuals:
- AI Interface Interaction : Depict a person interacting with an AI interface, symbolizing the ease and accessibility of using AI in web development.
- AI-Generated Code : Show a screenshot of an AI platform displaying lines of code being produced in real-time, demystifying the process.
- Toolkit Layout : Illustrate a variety of digital tools laid out like a toolkit, each labeled with its function (e.g., JPEG to PDF, Word to PDF).
- Entrepreneurial Vision : Conclude with an aspirational image of a thriving digital entrepreneur managing a bustling online platform from a sleek, modern workspace.
These carefully crafted images, aligned with the textual content, not only enrich the article but also serve as powerful tools for engagement, helping to visualize the transformative journey from idea to successful digital enterprise.
Additional Resources
We are providing you Prompts and a Working Sample Code that you can us and try.
Prompt
“”https://www.ilovepdf.com/jpg_to_pdf Look at this page, this is actually JPG to PDF converter page. Core Function of this page are, Convert JPG uploaded or Draged from PC or mobile Convert JPG uploaded by Dropbox URL Convert JPG Uploaded by Google Drive Link””
Sample Code
<div class="jpg-to-pdf-converter">
<div class="converter-header">
<h1>JPG to PDF Converter</h1>
<p>Convert JPG images to PDF documents for free, online and easy to use!</p>
</div>
<div class="converter-container">
<div class="upload-box" id="dropArea">
<div class="upload-icon">
<svg xmlns="http://www.w3.org/2000/svg" width="64" height="64" viewBox="0 0 24 24" fill="none" stroke="#4a6cf7" stroke-width="2" stroke-linecap="round" stroke-linejoin="round">
<path d="M21 15v4a2 2 0 0 1-2 2H5a2 2 0 0 1-2-2v-4"></path>
<polyline points="17 8 12 3 7 8"></polyline>
<line x1="12" y1="3" x2="12" y2="15"></line>
</svg>
</div>
<h3>Select JPG images or drag them here</h3>
<p>Your files are secure and will be deleted after processing</p>
<input type="file" id="fileInput" accept="image/jpeg" multiple style="display: none;">
<button class="upload-btn" id="selectFilesBtn">Select JPG Files</button>
</div>
<div class="cloud-options">
<div class="cloud-option" id="dropboxOption">
<div class="cloud-icon">
<svg xmlns="http://www.w3.org/2000/svg" width="24" height="24" viewBox="0 0 24 24" fill="#4a6cf7">
<path d="M6 14l-4 4 4 4h12l4-4-4-4m0-8l4-4-4-4H6L2 6l4 4"></path>
</svg>
</div>
<span>Dropbox</span>
</div>
<div class="cloud-option" id="driveOption">
<div class="cloud-icon">
<svg xmlns="http://www.w3.org/2000/svg" width="24" height="24" viewBox="0 0 24 24" fill="#4a6cf7">
<path d="M3 6l9 4v12l-9-4V6zm9-4l9 4-9 4-9-4 9-4z"></path>
</svg>
</div>
<span>Google Drive</span>
</div>
</div>
</div>
<div class="how-to-use">
<h2>How to convert JPG to PDF</h2>
<div class="steps">
<div class="step">
<div class="step-number">1</div>
<div class="step-content">
<h3>Upload JPG files</h3>
<p>Select files from your computer, Google Drive, Dropbox, or drag and drop them on the page</p>
</div>
</div>
<div class="step">
<div class="step-number">2</div>
<div class="step-content">
<h3>Convert to PDF</h3>
<p>Wait for the conversion to complete and download your PDF file</p>
</div>
</div>
</div>
</div>
<div class="features">
<h2>All the tools you need to work with PDFs</h2>
<div class="feature-cards">
<div class="feature-card">
<div class="feature-icon">
<svg xmlns="http://www.w3.org/2000/svg" width="24" height="24" viewBox="0 0 24 24" fill="none" stroke="#4a6cf7" stroke-width="2" stroke-linecap="round" stroke-linejoin="round">
<path d="M21 15v4a2 2 0 0 1-2 2H5a2 2 0 0 1-2-2v-4"></path>
<polyline points="17 8 12 3 7 8"></polyline>
<line x1="12" y1="3" x2="12" y2="15"></line>
</svg>
</div>
<h3>Easy to use</h3>
<p>Convert JPG to PDF in seconds with our free online tool</p>
</div>
<div class="feature-card">
<div class="feature-icon">
<svg xmlns="http://www.w3.org/2000/svg" width="24" height="24" viewBox="0 0 24 24" fill="none" stroke="#4a6cf7" stroke-width="2" stroke-linecap="round" stroke-linejoin="round">
<circle cx="12" cy="12" r="10"></circle>
<path d="M12 8v4l3 3"></path>
</svg>
</div>
<h3>Fast conversion</h3>
<p>Quickly convert your images without quality loss</p>
</div>
<div class="feature-card">
<div class="feature-icon">
<svg xmlns="http://www.w3.org/2000/svg" width="24" height="24" viewBox="0 0 24 24" fill="none" stroke="#4a6cf7" stroke-width="2" stroke-linecap="round" stroke-linejoin="round">
<path d="M19 21l-7-5-7 5V5a2 2 0 0 1 2-2h10a2 2 0 0 1 2 2z"></path>
</svg>
</div>
<h3>Secure</h3>
<p>Your files are protected and deleted after processing</p>
</div>
</div>
</div>
<!-- Modal for Dropbox/Drive -->
<div class="modal" id="cloudModal">
<div class="modal-content">
<span class="close-modal">×</span>
<h3 id="modalTitle">Connect to Dropbox</h3>
<p id="modalDescription">Enter the URL of your JPG files on Dropbox to convert them to PDF</p>
<input type="text" id="cloudUrlInput" placeholder="Paste Dropbox URL here">
<button id="processCloudBtn">Process Files</button>
</div>
</div>
<!-- Processing overlay -->
<div class="processing-overlay" id="processingOverlay">
<div class="processing-content">
<div class="spinner"></div>
<h3>Converting to PDF...</h3>
<p id="progressText">Processing your files</p>
</div>
</div>
<!-- Download overlay -->
<div class="download-overlay" id="downloadOverlay">
<div class="download-content">
<div class="download-icon">
<svg xmlns="http://www.w3.org/2000/svg" width="48" height="48" viewBox="0 0 24 24" fill="none" stroke="#4a6cf7" stroke-width="2" stroke-linecap="round" stroke-linejoin="round">
<path d="M21 15v4a2 2 0 0 1-2 2H5a2 2 0 0 1-2-2v-4"></path>
<polyline points="7 10 12 15 17 10"></polyline>
<line x1="12" y1="15" x2="12" y2="3"></line>
</svg>
</div>
<h3>Conversion Complete!</h3>
<p>Your PDF file is ready to download</p>
<button id="downloadBtn">Download PDF</button>
<button id="startOverBtn">Start Over</button>
</div>
</div>
</div>
<style>
.jpg-to-pdf-converter {
font-family: 'Segoe UI', Tahoma, Geneva, Verdana, sans-serif;
max-width: 1000px;
margin: 0 auto;
padding: 20px;
color: #333;
}
.converter-header {
text-align: center;
margin-bottom: 40px;
}
.converter-header h1 {
font-size: 2.5rem;
color: #4a6cf7;
margin-bottom: 10px;
}
.converter-header p {
font-size: 1.1rem;
color: #666;
}
.converter-container {
background-color: #f8f9fa;
border-radius: 10px;
padding: 30px;
margin-bottom: 40px;
box-shadow: 0 2px 10px rgba(0, 0, 0, 0.05);
}
.upload-box {
border: 2px dashed #4a6cf7;
border-radius: 8px;
padding: 40px 20px;
text-align: center;
margin-bottom: 20px;
transition: all 0.3s;
background-color: white;
}
.upload-box:hover {
background-color: #f0f4ff;
}
.upload-box.drag-over {
background-color: #e6ecff;
border-color: #2a56f5;
}
.upload-icon {
margin-bottom: 15px;
}
.upload-icon svg {
width: 64px;
height: 64px;
}
.upload-box h3 {
font-size: 1.3rem;
margin-bottom: 5px;
color: #4a6cf7;
}
.upload-box p {
color: #666;
margin-bottom: 20px;
}
.upload-btn {
background-color: #4a6cf7;
color: white;
border: none;
padding: 12px 24px;
border-radius: 5px;
font-size: 1rem;
cursor: pointer;
transition: background-color 0.3s;
}
.upload-btn:hover {
background-color: #3a5ce4;
}
.cloud-options {
display: flex;
justify-content: center;
gap: 20px;
}
.cloud-option {
display: flex;
align-items: center;
gap: 8px;
padding: 10px 20px;
border: 1px solid #ddd;
border-radius: 5px;
cursor: pointer;
transition: all 0.3s;
}
.cloud-option:hover {
background-color: #f0f4ff;
border-color: #4a6cf7;
}
.cloud-icon svg {
width: 20px;
height: 20px;
}
.how-to-use {
margin-bottom: 40px;
}
.how-to-use h2 {
text-align: center;
margin-bottom: 30px;
color: #4a6cf7;
}
.steps {
display: flex;
justify-content: center;
gap: 30px;
}
.step {
display: flex;
max-width: 300px;
}
.step-number {
background-color: #4a6cf7;
color: white;
width: 30px;
height: 30px;
border-radius: 50%;
display: flex;
align-items: center;
justify-content: center;
margin-right: 15px;
flex-shrink: 0;
}
.step-content h3 {
margin-top: 0;
margin-bottom: 10px;
color: #333;
}
.step-content p {
color: #666;
margin: 0;
}
.features {
margin-bottom: 40px;
}
.features h2 {
text-align: center;
margin-bottom: 30px;
color: #4a6cf7;
}
.feature-cards {
display: flex;
justify-content: center;
gap: 30px;
flex-wrap: wrap;
}
.feature-card {
background-color: white;
border-radius: 8px;
padding: 25px;
box-shadow: 0 2px 10px rgba(0, 0, 0, 0.05);
max-width: 280px;
text-align: center;
}
.feature-icon {
margin-bottom: 15px;
}
.feature-icon svg {
width: 40px;
height: 40px;
}
.feature-card h3 {
margin-top: 0;
margin-bottom: 10px;
color: #333;
}
.feature-card p {
color: #666;
margin: 0;
}
/* Modal styles */
.modal {
display: none;
position: fixed;
z-index: 1000;
left: 0;
top: 0;
width: 100%;
height: 100%;
background-color: rgba(0, 0, 0, 0.5);
}
.modal-content {
background-color: white;
margin: 10% auto;
padding: 30px;
border-radius: 8px;
max-width: 500px;
position: relative;
}
.close-modal {
position: absolute;
right: 20px;
top: 15px;
font-size: 24px;
cursor: pointer;
color: #666;
}
.close-modal:hover {
color: #333;
}
.modal-content h3 {
margin-top: 0;
color: #4a6cf7;
}
.modal-content input {
width: 100%;
padding: 12px;
margin: 15px 0;
border: 1px solid #ddd;
border-radius: 5px;
font-size: 1rem;
}
.modal-content button {
background-color: #4a6cf7;
color: white;
border: none;
padding: 12px 24px;
border-radius: 5px;
font-size: 1rem;
cursor: pointer;
transition: background-color 0.3s;
width: 100%;
}
.modal-content button:hover {
background-color: #3a5ce4;
}
/* Processing overlay */
.processing-overlay {
display: none;
position: fixed;
z-index: 1000;
left: 0;
top: 0;
width: 100%;
height: 100%;
background-color: rgba(255, 255, 255, 0.9);
}
.processing-content {
position: absolute;
top: 50%;
left: 50%;
transform: translate(-50%, -50%);
text-align: center;
}
.spinner {
border: 5px solid #f3f3f3;
border-top: 5px solid #4a6cf7;
border-radius: 50%;
width: 50px;
height: 50px;
animation: spin 1s linear infinite;
margin: 0 auto 20px;
}
@keyframes spin {
0% { transform: rotate(0deg); }
100% { transform: rotate(360deg); }
}
.processing-content h3 {
color: #4a6cf7;
margin-bottom: 10px;
}
.processing-content p {
color: #666;
}
/* Download overlay */
.download-overlay {
display: none;
position: fixed;
z-index: 1000;
left: 0;
top: 0;
width: 100%;
height: 100%;
background-color: rgba(255, 255, 255, 0.9);
}
.download-content {
position: absolute;
top: 50%;
left: 50%;
transform: translate(-50%, -50%);
text-align: center;
max-width: 400px;
width: 90%;
}
.download-icon svg {
width: 60px;
height: 60px;
margin-bottom: 20px;
}
.download-content h3 {
color: #4a6cf7;
margin-bottom: 10px;
}
.download-content p {
color: #666;
margin-bottom: 20px;
}
.download-content button {
background-color: #4a6cf7;
color: white;
border: none;
padding: 12px 24px;
border-radius: 5px;
font-size: 1rem;
cursor: pointer;
transition: background-color 0.3s;
margin: 5px;
width: calc(100% - 10px);
}
.download-content button:hover {
background-color: #3a5ce4;
}
.download-content button#startOverBtn {
background-color: white;
color: #4a6cf7;
border: 1px solid #4a6cf7;
}
.download-content button#startOverBtn:hover {
background-color: #f0f4ff;
}
/* Responsive styles */
@media (max-width: 768px) {
.steps {
flex-direction: column;
align-items: center;
}
.step {
max-width: 100%;
}
.feature-cards {
flex-direction: column;
align-items: center;
}
.feature-card {
max-width: 100%;
}
}
</style>
<script>
document.addEventListener('DOMContentLoaded', function() {
// DOM elements
const dropArea = document.getElementById('dropArea');
const fileInput = document.getElementById('fileInput');
const selectFilesBtn = document.getElementById('selectFilesBtn');
const dropboxOption = document.getElementById('dropboxOption');
const driveOption = document.getElementById('driveOption');
const cloudModal = document.getElementById('cloudModal');
const closeModal = document.querySelector('.close-modal');
const modalTitle = document.getElementById('modalTitle');
const modalDescription = document.getElementById('modalDescription');
const cloudUrlInput = document.getElementById('cloudUrlInput');
const processCloudBtn = document.getElementById('processCloudBtn');
const processingOverlay = document.getElementById('processingOverlay');
const progressText = document.getElementById('progressText');
const downloadOverlay = document.getElementById('downloadOverlay');
const downloadBtn = document.getElementById('downloadBtn');
const startOverBtn = document.getElementById('startOverBtn');
// Current state
let currentCloudService = '';
let filesToProcess = [];
// Event listeners
selectFilesBtn.addEventListener('click', () => fileInput.click());
fileInput.addEventListener('change', handleFiles);
dropArea.addEventListener('dragover', (e) => {
e.preventDefault();
dropArea.classList.add('drag-over');
});
dropArea.addEventListener('dragleave', () => {
dropArea.classList.remove('drag-over');
});
dropArea.addEventListener('drop', (e) => {
e.preventDefault();
dropArea.classList.remove('drag-over');
if (e.dataTransfer.files.length > 0) {
handleFiles({ target: { files: e.dataTransfer.files } });
}
});
dropboxOption.addEventListener('click', () => {
currentCloudService = 'dropbox';
modalTitle.textContent = 'Connect to Dropbox';
modalDescription.textContent = 'Enter the URL of your JPG files on Dropbox to convert them to PDF';
cloudUrlInput.placeholder = 'Paste Dropbox URL here';
cloudModal.style.display = 'block';
});
driveOption.addEventListener('click', () => {
currentCloudService = 'drive';
modalTitle.textContent = 'Connect to Google Drive';
modalDescription.textContent = 'Enter the URL of your JPG files on Google Drive to convert them to PDF';
cloudUrlInput.placeholder = 'Paste Google Drive URL here';
cloudModal.style.display = 'block';
});
closeModal.addEventListener('click', () => {
cloudModal.style.display = 'none';
});
processCloudBtn.addEventListener('click', processCloudFiles);
downloadBtn.addEventListener('click', downloadPDF);
startOverBtn.addEventListener('click', () => {
downloadOverlay.style.display = 'none';
filesToProcess = [];
});
// Functions
function handleFiles(event) {
const files = Array.from(event.target.files).filter(file =>
file.type === 'image/jpeg' || file.name.toLowerCase().endsWith('.jpg') || file.name.toLowerCase().endsWith('.jpeg')
);
if (files.length === 0) {
alert('Please select JPG files only.');
return;
}
filesToProcess = files;
startConversion();
}
function processCloudFiles() {
const url = cloudUrlInput.value.trim();
if (!url) {
alert('Please enter a valid URL');
return;
}
// In a real implementation, you would validate the URL and service
// For this demo, we'll just simulate processing cloud files
cloudModal.style.display = 'none';
cloudUrlInput.value = '';
// Simulate having files to process
filesToProcess = [{ name: 'cloud_image.jpg', size: 1024 }];
startConversion();
}
function startConversion() {
processingOverlay.style.display = 'block';
// Simulate conversion process
let progress = 0;
const interval = setInterval(() => {
progress += 10;
progressText.textContent = `Processing your files (${progress}%)`;
if (progress >= 100) {
clearInterval(interval);
setTimeout(() => {
processingOverlay.style.display = 'none';
downloadOverlay.style.display = 'block';
}, 500);
}
}, 300);
}
function downloadPDF() {
// In a real implementation, this would download the actual PDF
// For this demo, we'll just show an alert
alert('PDF downloaded successfully! (This is a demo)');
downloadOverlay.style.display = 'none';
filesToProcess = [];
}
// Close modal when clicking outside
window.addEventListener('click', (e) => {
if (e.target === cloudModal) {
cloudModal.style.display = 'none';
}
});
});
</script>You can directly paste this code into WordPress gutenburg as mentioned in the video. This will work Perfectly!