
Unlocking the V60: My Beginner’s Journey to Delicious Coffee
Welcome to My Coffee Adventure
Have you ever experienced the simple joy of a perfectly brewed cup of coffee? For me, that curiosity turned into a passion, leading me to explore the world of coffee brewing with the V60. This elegant tool promised not just a drink, but a transformative experience.
The moment I took my first sip, the rich aromas and complex flavors captured my heart. I realized that coffee is more than a beverage; it’s a medium for connection, bringing friends together over shared moments. Each brew is unique, and the process allows for creativity and experimentation.
In this article, I’ll take you on my journey with the V60, sharing the ins and outs of brewing. Ready to unlock the secrets of coffee? Let’s dive into this delightful adventure together!


Getting to Know the V60
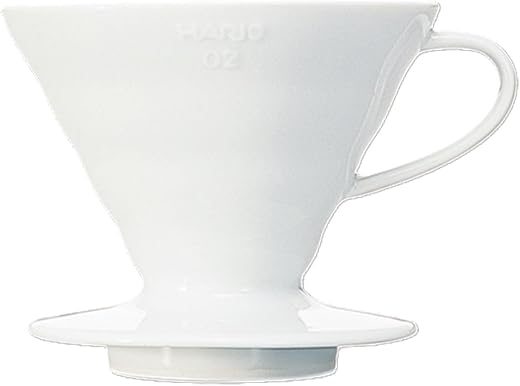
When I first laid eyes on the V60, its spiral grooves and cone-shaped design immediately intrigued me. This iconic coffee maker, crafted by Hario, combines both function and aesthetics, making it a favorite among coffee enthusiasts worldwide. But what sets it apart from other brewing methods?
The Design and Materials
One of the reasons the V60 stands out is its thoughtful design. The conical shape allows for even extraction, while the spiral ridges help facilitate the flow of water through the coffee grounds. It’s available in various materials, each offering unique brewing characteristics:
Each material influences the flavor profile and brewing experience, so part of my journey was figuring out which one suited my needs best.
The Pour-Over Experience
Deciding to use a pour-over method like the V60 was one of the best decisions I made. Unlike automatic brewers, pour-over coffee allows for a hands-on experience, giving me control over each step of the brewing process. From adjusting the grind size to controlling the water temperature, each element plays a role in the final cup.
What I love about the V60 is the ability to highlight the subtle flavor notes of different beans. Whether I’m using a fruity Ethiopian or a bold Brazilian blend, the V60 brings out the best in each one. It’s almost like having a front-row seat to the coffee-making process, allowing me to appreciate the craft that goes into each brew.
Why Choose Pour-Over?
As I continued my journey with the V60, I found myself eagerly experimenting with different beans and brewing techniques. Each experience was a step toward understanding the wonderful world of coffee.
With a grasp of the V60 and its unique advantages, I was ready to gather the essential gear and ingredients. This next step would help me set up the perfect brewing station for my coffee exploration!
The Essential Gear and Ingredients
As I embarked on my coffee journey with the V60, I quickly realized that having the right gear and ingredients is crucial for brewing that perfect cup. It’s not just about the V60 itself; a few key pieces of equipment and quality ingredients can elevate your coffee experience.
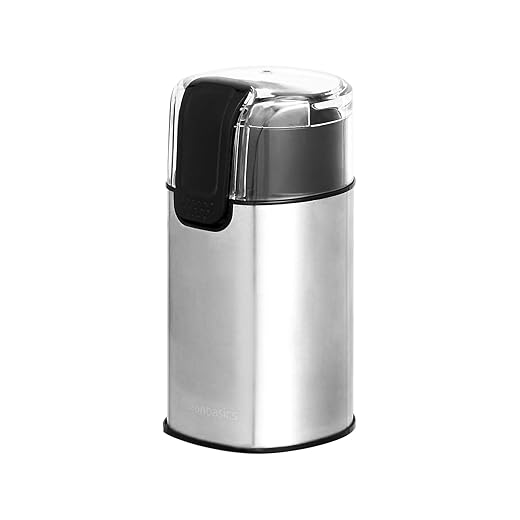
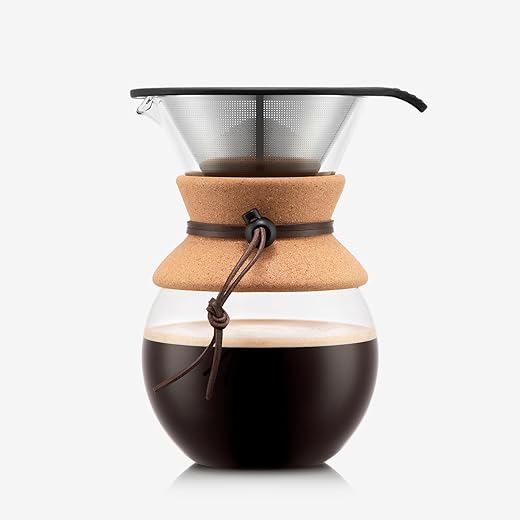
Essential Equipment
To start brewing with the V60, you’ll need the following equipment:
Choosing Quality Ingredients
Now that your gear is in place, it’s time to select your coffee. The freshness of your beans can make a significant difference. Here’s how to ensure you get the best:
Investing time in choosing the right gear and ingredients has already shown me the vast difference it makes in my brewing experience. Now, I’m excited to share how I mastered the brewing technique, allowing me to get the most out of these wonderful tools and ingredients!
Mastering the Brewing Technique
Now that I had my V60 and the essential gear in place, it was time to tackle the exciting yet daunting process of brewing coffee. I quickly learned that while the process may seem straightforward, the nuances involved in mastering the technique could mean the difference between a mediocre cup and an extraordinary one.
Finding the Perfect Grind Size
The first step to brewing delicious coffee with the V60 is selecting the right grind size. For a pour-over method, I discovered that a medium-fine grind, akin to table salt, works best. When I first started experimenting, I was either too coarse or too fine, resulting in either weak, watery brews or overly bitter cups. The key is to ensure the water flows evenly through the coffee grounds to achieve optimal extraction.
As I honed my grinding skills, I found using a burr grinder made all the difference. It provided a consistent grind, which helped me identify the specific taste profiles I was aiming for. If you’re exploring grinders, I highly recommend one that allows for adjustments in grind size to suit your brewing needs.
The Right Water Temperature
Next up was water temperature, an element I hadn’t initially considered critical. I learned that using water just off the boil (around 195°F to 205°F or 90°C to 96°C) would yield the best results. Too hot, and the coffee might turn bitter; too cold, and it could taste flat. My trusty kettle helped me monitor the boiling point, and I often let it sit for about 30 seconds once it reached a boil before pouring.
The Art of Pouring
Mastering the pouring technique was perhaps the biggest challenge for me. Initially, I found myself pouring too fast, which led to uneven saturation. After some trial and error, I discovered that the secret lies in a slow, controlled spiral motion. Here’s how I approached it:
- Start with Blooming: Begin by pouring a small amount of water over the grounds to saturate them and allow them to “bloom.” This releases carbon dioxide and enhances flavor. Let it sit for about 30 seconds.
- Spiral Motion: After blooming, pour the water in slow circles, starting from the center and moving outward before returning to the center. This ensures all grounds are evenly saturated.
- Maintain Water Level: Keep the water level consistent and avoid letting it drop too low before adding more water. This maintains extraction rates and improves overall flavor.
After many attempts, I finally nailed this technique. My brew began to transform into something truly wonderful, filled with bright flavors and aromas.
Timing is Everything
Using the scale with a timer became crucial for consistency. I learned that a total brewing time of about 2.5 to 3 minutes works well for most recipes. Measuring the coffee to water ratio was also vital for determining strength; I typically aimed for a 1:16 ratio (one part coffee to sixteen parts water).
As I watched the clock and adjusted my variables, I began to develop my own preferences and style, all while refining my technique.
With each brew, I felt more connected to the coffee-making process. However, there were still moments of uncertainty and challenges that required troubleshooting, as one brewing session seldom mirrors the next.
Empowered by my newfound knowledge, I was ready to delve into the intricate world of flavor profiles, where various beans revealed secrets that made every cup unique.
Exploring Flavor Profiles
As I settled into my coffee-making routine, I began to realize that every bean tells a story—one that can be unlocked through careful brewing techniques and a bit of adventurous tasting. My exploration of flavor profiles became a delightful aspect of my coffee journey, as I learned how different origins, processing methods, and even roast levels could dramatically alter the flavors in my cup.
Understanding the Origins
The first step in exploring flavor profiles is understanding how the coffee’s origin impacts its taste. Here are a few of the regions I’ve fallen in love with and their characteristic flavors:
Each origin offered a unique experience, and I loved the chance to play around with brewing techniques to highlight those different aspects. For instance, I noted that Ethiopian beans really sang when brewed carefully with a lighter hand, allowing delicate flavors to shine.
Experimenting with Processing Methods
As I dove deeper, I learned that the processing method could also influence a coffee’s flavor. Here are a few examples:
Testing Blends and Roast Levels
Once I got the hang of single-origin brewing, it was time to venture into the world of blends and different roast levels. Each blend told a story, combining beans from various origins to create balanced and unique profiles. I particularly enjoyed a medium roast blend that brought together fruity and nutty elements without overpowering my palate.
When playing with roast levels, I noticed:
There’s something thrilling about cupping the coffee and jotting down tasting notes. As I savored each cup, I became more adept at identifying flavor nuances and pairing them with different moments in my day.
Finally, my coffee journey felt like a thrilling adventure in taste, filled with rich experiences and endless possibilities. With this knowledge in hand and an ever-expanding palate, I was eager to tackle the next challenge—troubleshooting and fine-tuning my brewing for the most delightful outcomes!

Troubleshooting and Tips for Success
As my V60 journey unfolded, I quickly realized that mastering the brew wasn’t always a straightforward path. Some days, it felt like every cup I made could use a few tweaks for optimal taste. Here, I’ll share common pitfalls I encountered, along with lessons learned and simple tips that boosted my brewing game.
Common Mistakes
- Under-Extraction: This typically leads to weak, sour coffee. It can happen if the coffee grind is too coarse or if the brewing time is too short.
- Solution: Aim for a medium-fine grind, like granulated sugar. Adjust your brewing time to between 2.5 and 3 minutes.
- Over-Extraction: On the flip side, too bitter or astringent coffee can result from fines clogging the filter or an overly fine grind, which retains too much coffee oils and flavor.
- Solution: Ensure your grind is consistent and not too fine. Experiment with the pour technique to prevent clogging, and don’t skip the blooming step!
- Water Temperature Issues: If your coffee tastes bitter or flat, your water temperature might be off. Brewing with water that’s too hot can scald the coffee, while too cool water won’t extract flavors effectively.
- Solution: Use water that’s between 195°F and 205°F, allowing it to cool for about 30 seconds after boiling.
Key Tips for Improvement
It’s worth noting that even when things don’t go according to plan, each mistake contributes to your growth as a coffee enthusiast. This journey requires patience, curiosity, and a dash of creativity.
Armed with these troubleshooting tips and insights from my own experience, I felt more confident approaching each brewing session. Ready to take on any challenge the V60 would throw at me, I looked forward to sharing my growing expertise and excitement for coffee with others.
With my troubleshooting toolkit in hand, I was eager to venture further into my coffee journey and explore the myriad flavors that awaited—now the stage was set to dive into the thrilling realm of flavor profiles!
Embarking on Your Coffee Journey
Looking forward to where your coffee adventure may take you! There’s so much waiting to be discovered.

Embarking on Your Coffee Journey
In conclusion, I want to encourage fellow coffee lovers and beginners to embrace the process of learning with the V60. This journey has not only enhanced my appreciation for coffee but also allowed me to explore the intricate flavors each brew can offer. Every cup is a new opportunity to experiment and discover.
I invite you to embark on your own brewing adventures with the V60. Remember, each step you take is part of the learning experience. Don’t be afraid to make mistakes—they’re just stepping stones to your perfect brew. Happy brewing, and may your coffee journey bring you joy and delicious discoveries!


Loved your tips on troubleshooting! My pour over always turns out bitter. I guess I need to adjust the grind size… 🤔 I just bought the Amazon grinder, so hoping that’ll help! Any other suggestions?
Sounds like you’re on the right track! Also, try brewing a bit cooler—might help with that bitterness!
Try a coarser grind, it might solve that issue. I had the same problem before!
Just brewed my first cup using your directions! It’s… not bad! But I think I didn’t grind fine enough. 😂 Which one did you find works best for the V60?
A medium-fine works really well for me! You’ll find your sweet spot eventually!
Glad to hear you’re trying it out! Fine to medium-fine should help. Keep experimenting!
Nice write-up, but I still feel intimidated by the V60 😂 It looks so fancy! Maybe I should stick to my French press for now?
Don’t be scared! It sounds more complicated than it is. Once you get the hang of it, you’ll love it!
Start slow, Daniel! The French press is great, but the V60 can take your coffee to the next level!
Honestly, once you nail the V60, you’ll never want to go back!
So I bought the Borosilicate Glass Coffee Maker after reading your article. I couldn’t resist! 😊 But it shattered when I was cleaning it! Any advice for like… replacements?
Oh wow that sucks! But maybe try the STANLEY set? It’s pretty rugged!
Oh no, Nina! 😱 Make sure to check out thick glass options next time! They’re more durable!
I didn’t realize V60 could have so many flavor profiles! Gonna be wild experimenting once I get my scale! What’s the craziest combo you’ve tasted?
That sounds heavenly, Emma! Roberto, don’t be afraid to mix and match!
I tried a fruity Ethiopian with a hint of chocolate! Mind blown! 🍫🍒
Honestly, I thought making coffee was easy, but it’s been challenging! I mean, who knew there’s a science to it? 😅 I while thought the supermarket grinds were fine until I read this!
You’re ahead of the game just being aware of it! That’s the first step!
The good news, Tom, is that once you master the basics, it gets pretty fun!
Excellent intro to the sampler skills! I’m gonna try trying different coffee regions—gotta find my flavor! Any tips on where to start? ☕
Definitely explore various regions! Ethiopian coffee tends to have floral notes; it’s a nice place to start!
I hear Central American coffees are lovely for starter tastes! Give it a go!
Good article, but I’m still confused about how to properly measure coffee grounds. Do you really need the precision scale??
A scale definitely helps, Mike! It ensures you’re not over or underdosing your coffee.
Yes! The precision scale makes it sooo much easier to be consistent. You’ll see what I mean! 📏
Totally agree! But if you’re on a budget, you can always eyeball it at first!
Quick question: Is it better to grind coffee fresh every time? I’m still figuring out that balance you mentioned…
Absolutely! Fresh ground coffee makes a HUGE difference! You’ll taste the improvements!
Yes, grinding just before you brew is key! Nothing beats fresh coffee!
I might be late to the party, but I finally JUST bought the electric grinder you mentioned. Can’t believe I waited this long! 😂 Here’s hoping it saves me time!
You’ll be in heaven with that! No more cranking the manual one for me!
Glad you took the plunge! You’ll love the consistency it offers.
I just got the Hario V60 and I can’t believe the difference it makes! 🙌 Can’t wait to try some of those flavor profiles you mentioned! I struggled at first, but your tips really helped me out. Thanks!
So happy to hear you’re loving it, Lucy! Don’t forget to play with the grind size too!
What type of coffee beans have you been using, Lucy? 😄 I’m still experimenting! Any favorites?
Your brewing technique section was golden! I’d totally underestimated steeping time—wow, what a difference! Thanks for the kick in the pants! ☀️
Glad to hear you found that useful! It’s those little details that really matter!
Thanks for the feedback, Bethany! Yes, time is everything when it comes to brewing!